Accessioning
Accessioning is the registration of the specimen in the laboratory, for analysis. The process not only records the specimen information, it records the ordering client (the clinician or the non-clinical Entity/Individual and the patient's information, if applicable, along with the testing to be performed. The entire testing and reporting of the specimen depends on this accessioning process of the lab's workflow.
PROLIS is equipped to have local accessioning (in lab accessioning), the local Order Entry and Remote Order Entry (via Lab's portal and the interfaced EMR). In PROLIS domain, an accession is defined as an order with the specimen received. An order without the specimen is referred as a random order.
PROLIS also provides you the capability of managing the Future Orders and/or the Standing Orders, arranged under the Accession menu in PROLIS, also referred as the Scheduling. Scheduling is also available in the Lab's portal we provide.
Instant Procedure
-
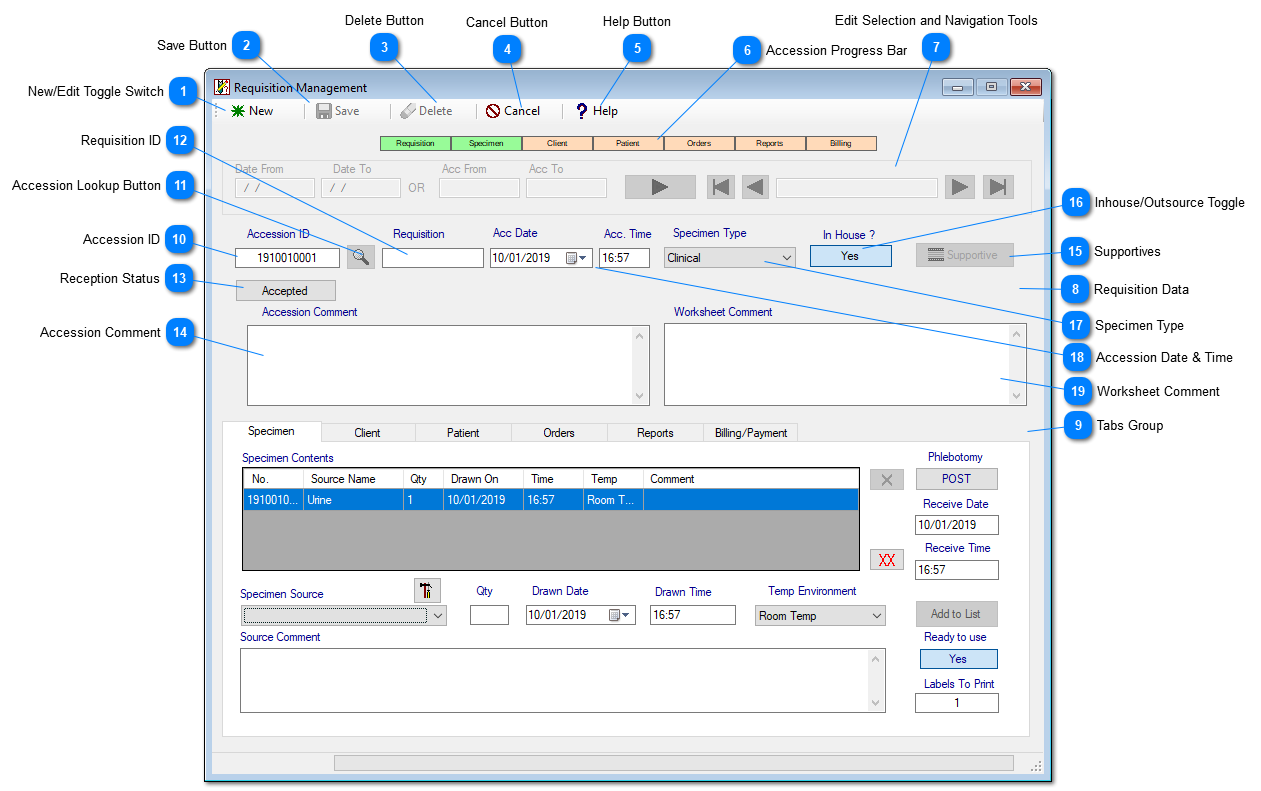
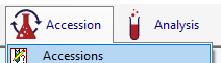
Navigate to the Accession Menu and click the Accessions menu item.
-
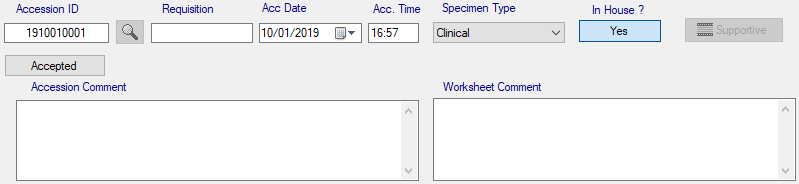
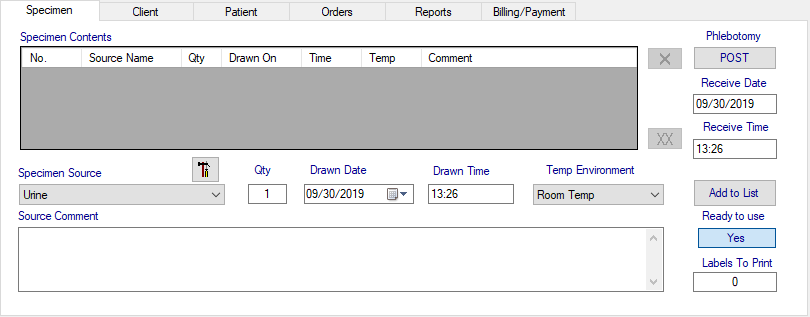
To enter a new accession, leave the default setting 'New' of the top left button and start entering the information. Click the button toggling its setting to 'Edit' otherwise.On top middle of the screen there is the accession progress bar, indicating the progress of the accession, while you are entering the accession data
 Using the Tabs, each corresponding to a section within the progress bar, enter the data. The entered data will change the background color of the corresponding section of the bar, from Peach (needs data) to Green (received data). The accession 'Save' button will only be available when the system has all the required data. Until then, it will be greyed out.
 -
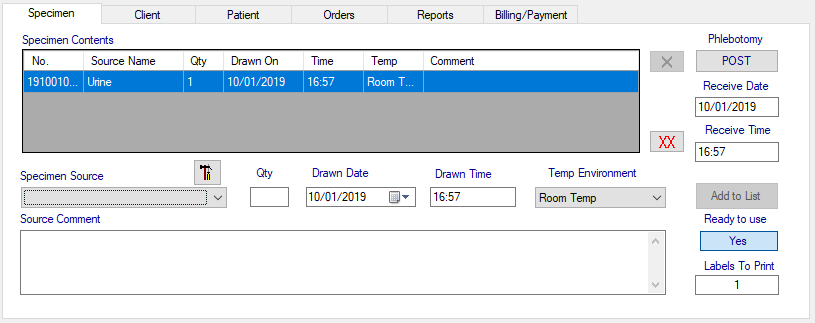
Enter the specimen information, using the 'Specimen' tab in the middle of the screen.
-
Select the specimen source, using the Specimen Source dropdown.
-
Adjust the quantity if the source, by modifying the 'Qty' field's default entry (1) per your requirement.
-
Adjust the collection date and the time by using the Drawn Date and the Drawn Time respectively.
-
Select the temperature of the source, using Temp Environment dropdown.
-
Click the 'Add To List' button at the end of these attribute fields.
-
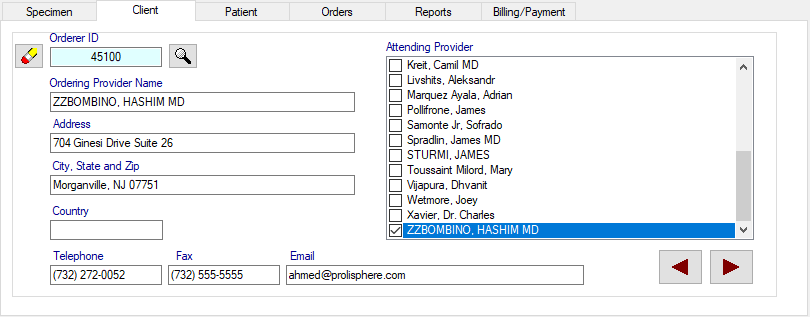
Repeat above steps for additional specimen sources.4. Enter the client information, using the next 'Client' tab.
-
Type in the Client ID (if known) in the Orderer ID field or use the lookup button to select the client who referred the specimen to you.
-
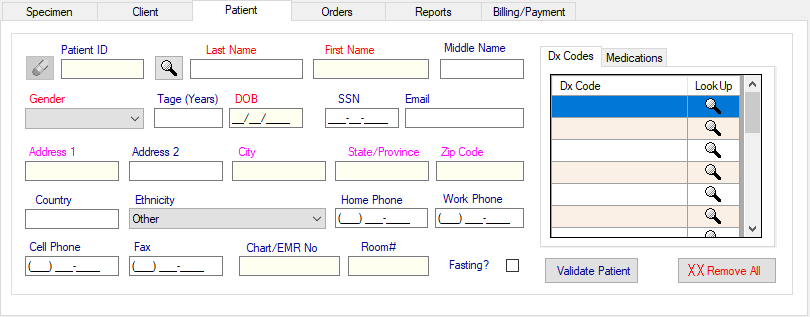
Check the Attending Provider from the list of providers working under the Entity umbrella, on the right side.5. Enter the Patient information (if applicable - clinical specimen), by clicking on the 'Patient' tab.
-
At minimum, enter the information in the red labeled fields (Prolis required), It is suggested and recommended to enter maximum possible information.
-
Magenta color labeled fields are conditionally required. Except for the Client billing and Gratis (free), these fields are required. However, leaving these fields blank, the accession progress won't stop.
-
For Third Party (Insurance) billing, enter the valid ICD-10 diagnosis codes. System may prompt you to search valid codes, if invalid code is entered.
-
For Toxicology specimens, click on the 'Medications' sub tab next to the Dx Codes sub tab, and enter/select the prescribed drugs.6. Enter orders by clicking on the 'Orders' tab.
-
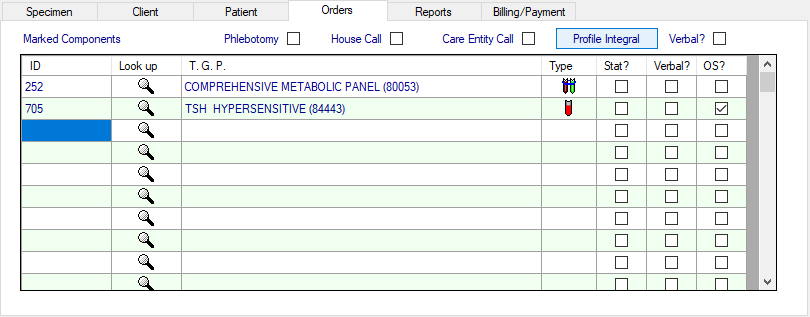
Type in the component ID (if known), in the first blank cell of the 'ID' column (the left most of the grid) or click the adjacent lookup button, to search the component to order. In either case if the component being ordered is compatible to one of the specimen sources entered under the Specimen tab, the component will be displayed. That is the indication of a successful entry of this order. Otherwise a message will be displayed, of an incorrect specimen.
-
Repeat this process until all the orders have been entered.After entering the orders, check the accession progress bar. If all the sections are green as shown below, go ahead and click the save button.
 Otherwise resolve the issue located within the tab corresponding to the peach colored section of the accession progress bar.7. You may make the additional report distribution entries, using the 'Reports' tab.
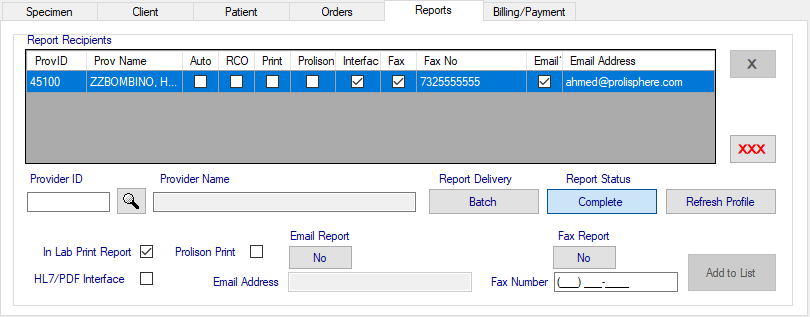 You should always the default entry of the report distribution for the ordering client, in this tab. To make any change (Fax, Email, Interface, Prolison and/or of the report status, click the entry and click the 'X' delete button or 'XXX' delete all button to remove the entry. The grid should be blank.
 -
Type in the ordering client ID in the provider ID field, just below the grid or click the lookup button next to the Provider ID field, to select the ordering provider.
-
Make the required changes, using the report status andoor the media (Fax, email, Prolison and the Interface check) fields. Finally click the 'Add to List' button, to make the entry back to the grid.
-
To add the additional report distribution entries, select the desired provider, adjust the report distribution parameters and click the 'Add to List' button.
-
Repeat the above steps for all desired entries.8. You may change the billing type of the accession and/or update the Insurance information, by using the 'Billing/Payment' tab.
-
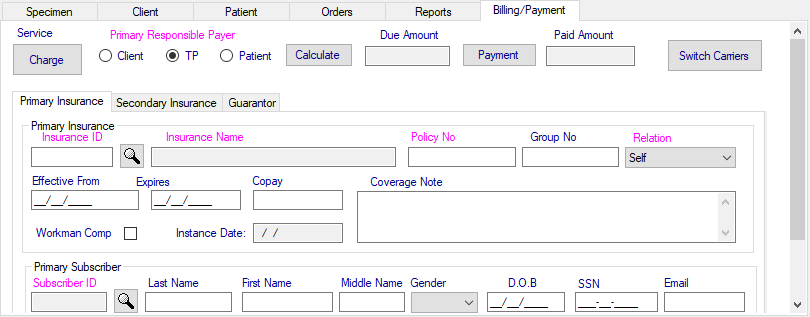
You may turn an accession from a 'charge' item to a 'Gratis' (free) one, by clicking the top left button, labeled 'Service', and clicking again, back to 'Charge'.
-
Once the accession is a charge item, you may change its billing type to one of the desired Prolis offering, Client, Third Party (TP) or the Patient billing types.
-
The billing type 'TP' requires additional information, the selection of the Insurance company, the Policy number, optional Group number and the subscriber's relation to the patient.
-
The system will only turn the accession progress bar's Billing section, green when all the required information is entered.9. Click the Save button to save the new accession or the changes to the existing accession.